Wednesday 26 June 2013

Artsy Wednesday - Sewn Patches

Hi everyone,

Here we are, halfway through the week again. I hope yours is going well.  This weeks Artsy Wednesday Theme is sewn patches. 

To be honest, if it hadn't been AW this week, I wouldn't have been posting any nail stuff.  My dermatitis is back, which means my cuticles are going downhill, and as you know I had to cut all my nails down, and I'm still nursing that break on my little finger.  Such is life.

I did consider using my right hand, but then I went and broke the corner off a nail on that hand today too!  (Stupid work photocopier) At least I suppose I'm getting all the hand ugliness out of the way at once haha.

I wasn't really sure about what to do for this one, so decided to just be literal about it, and paint some patches on my nails.  Here's what I came up with:
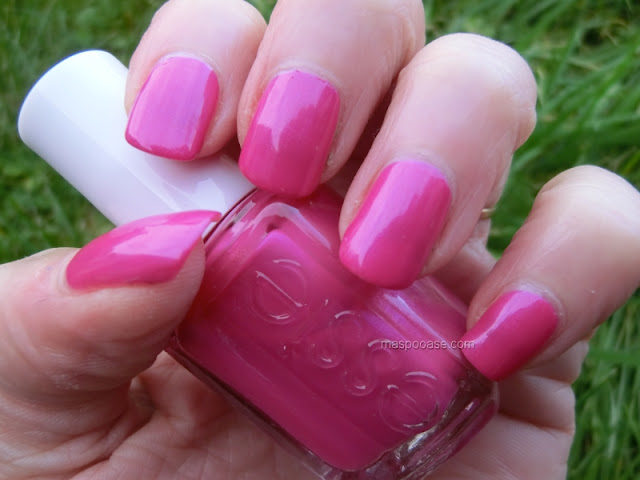
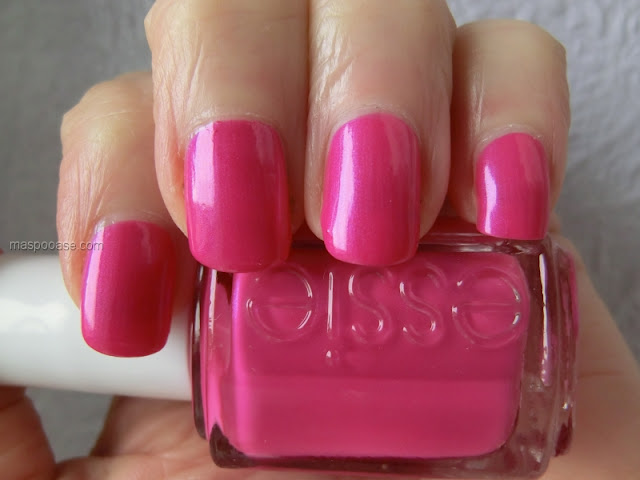
The base for this is my favourite light pink, OPI Mod About You.  This made it to number 6 on my all time favourite top ten polishes post (link) so that tells you how much I like it!  This is one quite generous coat and it's completely opaque.

I then used a darker pink shimmery Rio striper and a dark blue Kiss striper to draw the patches.  On top of that I used a Claire's white striper for the stripes, and Essie Blanc and a dotter for the dotty patches.

Here's another pic:
It's all topped with a coat of Seche Vite.

So despite not really being in a nailart-y mood, and not having much of an idea what to do when I started, I don't think this came out too badly, it's always nice (and surprising) when that happens.

Don't forget to check out what the rest of the Artsy Wednesday girls have come up with for their patchwork nailart:

Catrine at Unnaked Nails (link)
Michelle at Labmuffin (link)
Alanna at Pretty Purple Polish (link)
Maria at Maria's Nail Polish Blog (link)
Melanie at Nail and Polish (link)
Jessica at Beauty Gnome (link)
Emily at An Accent Nail (link)
Ameerah at Valiantly Varnished (link)

Until next time...

MASPOOASE x x x
~Wendy~

Sunday 23 June 2013

Koi Nailart Tutorial

Hi everyone!

I hope your weekend's going well.  All's well here, this week has whizzed by, nearly at the end of June already, hard to believe, where's the year going?

Typically it's been sunny all week, and as soon as it gets close to the weekend, it's pouring down with rain!  I don't mind a bit of rain though, as long as I don't have to be out in it of course.  It's good for the garden.

This is a nailart design I've had in my head for a long time, I've always loved the look of Japanese design, so simple and perfect, and when I saw MrCandiipants YouTube tutorial for Japanese Koi nailart (link) I wanted to do it then and there.  But as is always the way, I did something else, and then time passed, and I never got around to it.

So, while my mojo was gone, I scratched around in my memory for other peoples designs I'd like to try, and this is one of the first ones that came to mind.

This is what I made:
You might notice the polish on my little finger looks a bit dodgy.  There's a good reason for this.  And here it is:
Yep.   A break above the nail line.  Gruesome.  I somehow caught my nail badly on the wardrobe door, and sadly this time the nail didn't make it.  I've employed the teabag method from Addicted To OPI-Yum (link to post) to try to at least grow it out, so it's not painful when I cut it off, which I'll have to eventually.  Babying damaged nails along is not my idea of fun.  Obviously I'm no good at buffing the repair out, because even with polish on, it still looks rough.  My nails are ready for a good cut anyway, as I prefer them short.

So, that's what made me try an ombre look.  Because I have this mend on my little finger, I wanted to use a light color on it.  But I didn't want to use a light background for my fish, which is white, so an ombre seemed like the ideal workaround.

This is another one of those nailart designs that looks harder to do than it was.  So I thought I'd do a photo tutorial for it.  So here we go!

Step one.  Paint your nail:
I've chosen blue because we're doing fish, and I'm very literal.

Step two.  Paint a leaf/teardrop shape on your nail using white nail nail polish.  I used OPI Alpine Snow and a small nailart brush:
Step Three.  Making more leaf shapes, draw in the tail, and some dashes for the fins:
Step Four.  Wait for that to dry, and go over it again with the white:
It's lumpy bumpy, but that doesn't matter.

Step Five.  Make some orange blobs.  I did dots with my brush.  You could definitely use a dotter or a cocktail stick at this point.  I'm using the same orange as she used on the YouTube tutorial.  Essie's Orange Its Obvious, which was perfect for it:
Step Six.  Now we're onto the black bits.  I used the scented black from the Simple Pleasures Halloween collection I reviewed a while back (link), but of course you can use any black you have.  We're making small dots for the eyes, and a black line down his spine:
I think the eyes really bring him to life.  Now, you could leave it like this if you like, but I think it looks better if you do some black in his pattern:
So, now all you need is a topcoat:
All done!  As you see, it didn't matter about the lumpy-bumpy-ness.  I decided not to do an ombre on this hand.

Here's a pic of the blues:
Barry M in Cobalt and Cyan Blue, 2True in shade 2, and a random unnamed Color Club:
And for the fish I used OPI Alpine Snow, Essie Orange It's Obvious, Simple Pleasures black, and Seche Vite topcoat.

As you might have noticed, I did the tutorial painting with my weaker left hand.  I think that's always a good test of how hard a nailart design is.  If you can do it with your wrong hand, there's a good chance that alot of people are going to be able to give it a go.

And there we have it, do you think you would give it a go?  I'd love to see your creation if you do.

What do you do when you lose your mojo?

Until next time...

MASPOOASE x x x
~Wendy~

Wednesday 12 June 2013

Artsy Wednesday: Inspired by a brand - Louis Vuitton Nailart

Hi everyone,

This weeks Artsy Wednesday is a bit of a cheat for me.  I've had these pictures since before I joined Artsy Wednesday, and when I saw this theme I kept them back as they were so perfect for it. 

So although I've had them a while, I'm still excited to show them to you, because when I did them, I absolutely loved them!  I came across the advert in my photos, if I remember rightly, when I bought Glamour Magazine for the free Nails Inc polish that came with it (yes, I'm cheap haha).  As soon as I saw the advertisement, I knew I had to have the design on my nails as I liked it so much.

Originally I attempted to freehand the design, but that was a total disaster, so I turned to my stamping plates, and amazingly I didn't have one that was right.  So I went to Amazon, and found a Gals set that had a plate in that looked like it might do the job.  I got the Princess set (link) which cost £7.99 inc shipping for 25 plates - BARGAIN!  The quality is really good too.  I know it seems a bit much to go to these measures for a single design, but I really, really, wanted to do it.

Here's what I came up with:
I used OPI Alpine Snow for the base, and then stamped over it using Color Club Almost Famous.  I tried a few yellows, but this was the best match.  I meant to do my ring finger beige to match the background ladies, but forgot - doh!

Here's another pic, a bit closer up:
As you can see, even with stamping, my checks are a tad wonky, but hey, you get the idea, right?  I went over it with a topcoat of Seche Vite to smooth it all out.

One last pic of my nails.  I took so many, and have had to weed lots out.  I like this one as the checks on my nails are almost exactly the same size as the ones on the handbag, which makes me happy.  I'm a bit strange like that:
And here's the advert that got the whole thing started:
Now, I'm sure I wouldn't be able to afford ANYTHING in that advert haha, but at least I can have a bit of LV style on my nails!  What do you think?

Don't forget to check (pun alert!) out what all the other super-talented Artsy Wednesday girls have come up with:

Catrine at Unnaked Nails (link)
Michelle at Labmuffin (link)
Alanna at Pretty Purple Polish (link)
Maria at Maria's Nail Polish Blog (link)
Melanie at Nail and Polish (link)
Jessica at Beauty Gnome (link)
Emily at An Accent Nail (link)
Ameerah at Valiantly Varnished (link)

Until next time...

MASPOOASE x x x
~Wendy~

Sunday 9 June 2013

Pretty Jelly Lovey Dovey Swatch and Review

Hi All,

Today I bring you more holo!  I've been on a bit of a holo mission since the sun came out, as you may have noticed, with varying success.  So far my only real let down has been the Layla Retro Pink (link to post) which left a gap in my collection for a pretty pink holo.

It's no secret that I love Pretty Jelly polishes, the formula and coverage are so good, what's not to love?  So I went on the hunt to see if they do a pale pink holo, and happily they do.  Now usually this is the point where I'd need to find me a lovely mule to get my polish over (hi Wes! *waves*), but now I don't have to inconvenience them any more, as Pretty Jelly polishes are now available from Mei Mei Signatures who ship to the UK.  If you want to try indie polishes, but haven't been able to get hold of them, have a look (here), she has so many.  Happy days!

So without further ado, let me show you this little beauty:
Pretty-Jelly-Lovey-Dovey-Swatch
I knowwwwww, right?  Sooo pretty! A scattered holo rather than a linear effect, but on this shade I think that's just right.  Some light pinks can make my skintone look awful, but this one has enough blue/purple in the holo shimmer to offset that. 

Here's how it looks in the shade:
Pretty-Jelly-Lovey-Dovey-Swatch and review
The shimmer in it keeps it light and stops it from being too cutesy, somehow it's a grown-up shade, and I think it would be a brilliant bridal colour.  Feminine without being over the top.  It's actually the only polish I've worn to work that's caused a stir, lots of people have said they like it.  For a pale colour you wouldn't think it would attract attention, but this one certainly seems to.

Here's a close up of that glorious holo in the bottle:
Rainbows, yayyyy

And here's the business end, the brush:
The formula was Pretty Jellys usual buttery loveliness, no problems with application.  The brush was not too soft, not too stiff.  It reminds me alot of A-Englands formula, so if you've used those, you would know pretty much what to expect.  The first coat was pretty sheer (layering possibilities?), but the second coat covered up all VNL.  I did three though, as I wanted to cover up the very pronounced ridges on my nails, to show this off to its best.  As it dries really fast, it wasn't a chore.  I just used normal base coat, and no top coat, as it's shiny enough not to need it.  All Pretty Jelly polishes are three-free, and cruelty free, so no worries there.

But, I can't leave you with that boring (but necessary) photo.  The bluebells are finally out in our garden, and they're so lovely I had to share.  Mother Nature really knows her stuff.  Apparently our bluebells are Spanish ones rather than English ones, but they're still mega pretty:
Normally at this juncture, I'd throw in some nailart for good measure.  BUT I just couldn't bring myself to paint over this, I've been wearing it all week and I'm still not bored of it, which is pretty amazing for me.  It's definitely my new polish BFF.

You can buy Lovey Dovey (when it's back in stock) from Mei Mei using this (link)

I bought two Pretty Jelly polishes, and paid using Paypal, and in total I paid £22.65 including shipping.  A bit more than high street polishes, but, that much better than high street polishes, and not as expensive as couture polishes.  So price-wise, I think it sits nicely in that gap.  I ordered it on the 29th of May, and it came on the 6th of June, which considering it came all the way from Singapore, is pretty damn awesome!

I have tried so much not to get too gushy about this polish, but I don't think I succeeded too well.  If you're in the market for a light pink scattered holo - look no further!

Until next time...

MASPOOASE x x x
~Wendy~

Saturday 8 June 2013

Perfect Formula Pink Gel Coat 60 Day Review

Hi there again everyone, I hope your weekend is going well?

Today I bring you the culmination of two months of trialling The Perfect Formula Pink Gel Coat nail strengthener.  I kept a diary as I went along, and as with all things like this, I started off really keen and wrote in it all the time, then as time went on it wore off, and by the end I hardly wrote in it at all haha.

This review came about because the kit was for sale on QVC on a Today's Special Value deal, and I went online looking for blog reviews (the only place I go for reviews now), and they were all after one week or so of use.  My main problem with nail strengtheners is that they make my nails go brittle after a month or so of use, so short term reviews were not what I needed.  I have had this problem with Nail Envy, Diamond Strength, Maximum Growth, and others.  One minute I would have nice long nails, and the next minute, ping! nail missing.

Therefore, I decided to buy it anyway and write my own review, so here I am.  Apologies in advance that quite a few of these pictures are iPhone pictures, therefore a bit blurry, but they show what they need to so I decided to go with them anyway.

This is the kit that I got:
It contains two 18ml pink gel coats, one 18ml clear gel coat, and one of each in travel 5ml sizes.

Here's the front of the box:
As you can see, it sounds great, strong and long nails?  Lovely!  Now, silly me, I didn't take a picture of my nails before I started, because I did have peeling and splits, but I couldn't get it to show, I wish I'd taken the picture now, but too late for regrets!  I will just type out the diary as I wrote it.  Here goes...

Perfect Formula Diary

First application: thinner and faster drying than i was expecting from past reviews, is just like normal base coat
 

Tues 9th April Day 1 - nails do feel less bendy
Quite a bit whiter almost blue looking (surprising!)
Ring finger with split feels a bit more sturdy
Doesnt fill ridges
 
Day 2
No apparent chipping or yellowing
Ring finger split starting to give way - superglued
Hairline crack appeared in middle finger
Did another coat to smooth over spilled superglue
 
Day 3
Nails more natural colour with 2nd coat
Ring finger split glue holding
Middle finger crack no worse
Also ridges more covered but not gone
Painted nails, didnt like colour, took it off, PF removes fine with polish remover
Applied 1 coat again
 
Day 4 Friday 12th April
Nails back to being super-white/blue looking
Glued ring finger split holding
Middle finger crack feels like its about to give way
No new peeling/splits
After work bashed middle finger on door, nail broke along crack
Filed it down, will file rest down to match, hopefully get down past ring finger split

Days 5&6
Weekend so polish on & off all weekend - all nails filed down to match - left with one coat of PF on
Good because nails have no peels or cracks so will see if any new ones form
 
Tues 16th
Looking REALLY closely can see some tip wear. Bluey/whiteness has toned down (yellowed?)
No peels or splits
Painted nails; didnt like it, took it off
Put on 2 coats of PF after, wrapped tips this time
 
Weds 17th
Back to bluey white nails
Theyre feeling quite hard, hope they dont go brittle (a'la nail envy)
 
Thur 18th
Bashed right hand middle nail on door hard, peeled a bit but actually held up better than normal. Filed/buffed resulting jaggy edge
Some chipping is slightly evident but have to look really close
 
Mon 22nd April
Had polish on all weekend, removed on sunday night, loreal turquoise (sunflower nails) no staining, but not sure if this colour stains. Dont usually have much probs with staining anyway though. No peeling still, quite impressed, nails not feeling brittle yet either
Caught right hand middle on door (again!) this time no breakage
 
Weds 24th April
Feeling a few jaggy edges (maybe mild peeling) right index & left middle. Applied thick coat to all nails
Just noticed, left index, big peel starting!
 
Thurs 25th
No further peeling, have put a thick coat on left index peel so it doesnt catch on anything, that nail is now slightly pinker than the rest, ha!
Right hand index showing a small split right at the end
 
Weds 1st May
Filed left index down due to peeling, right little/ pinkie showing translucent/weakness on outside edge. Right index small peel. Had nails painted & removed yesterday, bare overnight, fresh coat of PF this morning. Yesterday a miniscule chip appeared in right middle finger nail. But so far in use no breaking and no brittleness which i would have had by now with nail envy or maximum growth
 
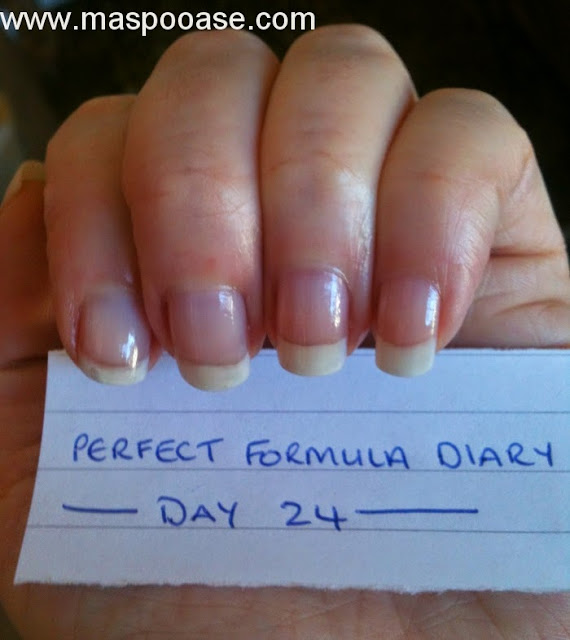
Thurs 2nd May (day 24)
Nails that are a bit peely now:

L&R index, left little finger
Rest ok
No brittleness
Nails a bit dehydrated.  Oiled all over after taking this pic, including under free edges:

Saturday 4th May
Star wars day lol. Filed down left middle, ring & little (pinky). No damage but they were starting to outgrow damaged index & look untidy
 
Wednesday 8th May
Quite significant peeling on both index fingers. Nails not brittle though. Filed and buffed to minimise appearance of peeling
 
Thursday 9th May (day 31)
Both middle finger corners looking a bit peely, but on the whole nails feeling strong & still not brittle
 
Sunday 19th May
Both index & right middle show some peeling. Nails are starting to feel a bit hard & look dehydrated
 
Saturday 25th May
Just over half the bottle gone, starting to get 'strings' of polish because of the gloopiness, have put some thinner in it. Left middle finger nail broke on the corner while removing polish, where it had had a peel, so filed down past it
 
Saturday 8th June
So here we are at today:
Yes, I know I called my review the 60 day review, and it's day 61, but what the heck.  I do still have a little bit of slight peeling on my index fingers, but they take alot of bashing from typing all day so it's hardly suprising. 
 
An interesting thing happened the other day though, and solved the question I had on how a pink gel coat could have a blue-y tinge to it.  I was washing my cup out in the works kitchens the other day, and there's an ultraviolet fly killer in there, and what should I notice?
It glows!  How cool is that?  That must be the brightening effect in action.  It wasn't easy taking a picture of my nails without anyone seeing me do it haha.
 
So to recap, I didnt have any splitting at all, and after almost two months I am two thirds down the bottle having applied on average a new coat every other day.  It is alot gloopier now than when i started, but still useable. Am not sure you'd get right to the bottom used up without thinning it though.
Not a miracle product as i still did get some peeling, but overall impressed as my nails didn't go overly brittle as they have a tendency to do with strengtheners.  If I had to give it a score, it would be 7/10.
 
Here's a pic of the brush:
You can kind of tell the gloopiness from the bead of polish hanging onto the brush, but am almost out of thinner so until I get some more it will have to stay gloopy!
 
I would recommend this if (like me) you have problems with other hardeners making your nails brittle, as I haven't experienced that with Perfect Formula.  You can buy the kit I got from QVC UK (link) for £30.10 plus £3.95 shipping.
 
I couldn't see on the Perfect Formula website whether the brand is cruelty free, so I've emailed them and will update this post when I find out.  *EDIT: Perfect Formula have replied to me, and ALL their products are cruelty free - so happy days :-)*
 
The formula does contain formaldehyde (as most strengtheners do), but that doesn't bother me really, although I know it's a concern for some people so I thought I'd mention it.
 
And there we have it!  I hope it's been helpful.  What's your favourite strengthener?
 
Until next time...
 
MASPOOASE x x x
~Wendy~

Sunday 2 June 2013

Holographic Floral Nailart Inc. Artsy Wednesday - Vintage

Hi there Guys and Girls, I hope you're having a great Sunday.

I've had a pretty good weekend, I bought Zoo, a book by James Patterson & Michael Ledwidge, which was about all the animals in the world going bonkers, unfortunately I found I couldn't put it down, and I finished it this morning, so I will have to by another book now!  Also I bought some art stuff, which I'm pretty excited to play with.  I need another couple of days in the weekend to fit everything in.

This morning I woke up, and the sun was beating through the curtains, and I looked at my poor bare nails, and thought HOLO, because that's what us naileys do.  If you're one too, you'll obviously know this.

And also, as you can see from the post title, I couldn't do this weeks Artsy Wednesday, as it clashed with my blogiversary post (link) so while I was lying there in bed, I was thinking up with something that ticked both boxes.  Hopefully this manicure does that, I think it does anyway:
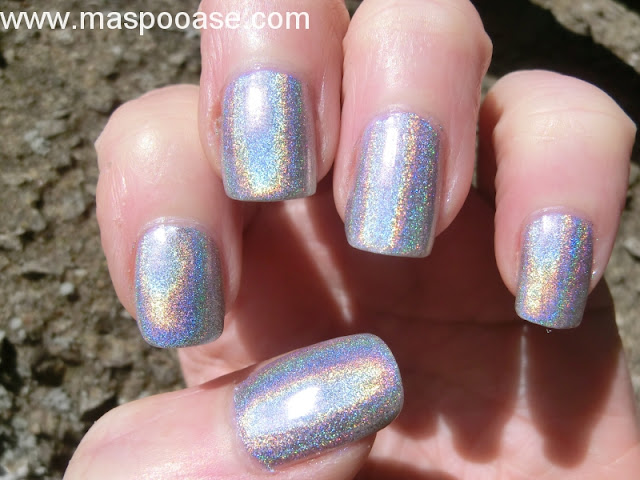
I see now that my cleanup wasn't brilliant, how come I never notice in real life, only when I come to resize my photos?  The base polish for this manicure is Jessica's Hologram Chic in Disco Diva.  I did a full review of it (here) but if you don't want to click about, here's what it looks like by itself:
Jessica Disco Diva review
This was two coats, over the basecoat polish that came with it in the Hologram Chic kit, and application was lovely, no bare patches or streaking.  The holo is much stronger in real life, but as with all holos, it's a bit camera shy.

I think the vintage look shows a bit better in the shade, it reminds me a bit of seventies wallpaper:
I used Nails Inc's Chelsea, which looks black in the the bottle, but as you can see it's really a dark plum, to stamp over the silver base, using Bundle Monster plate BM-224, and then used quite a few of my Pretty Jelly holos and A-England Holy Grail (the old version) to fill in the centres of the flowers using my trusty purple dotter.

Here they all are:
Left to right, top to bottom:
Layla Hologram Effect in Retro Pink - full review (here)
Nails Inc Chelsea - see how black it looks in the bottle?
Bundle Monster plate BM-224
A-England Holy Grail - swatches and review (here)
Jessica Hologram Chic - full review (here)
Pretty Jelly Glamorous Thief
Pretty Jelly Grape Escape - review (here)
Pretty Jelly Bullet Rouge, one of my favourites - review (here)
Pretty Jelly Fairy Ring - review (here)

And, I'll leave you with one last sunshiny pic, happily I've got my cuticles back to the point where I don't need to mess about with them in my editing program, which makes the photo part of blogging MUCH faster, thank goodness.  Sally Hansen's Healthy Cuticles Now certainly seems to work.  I should do a post about it.  How many times do I say this?
Don't forget to check out what the other girls in the Artsy Wednesday goup came up with for their vintage nails

Catrine at Unnaked Nails (link)
Michelle at Labmuffin (link)
Alanna at Pretty Purple Polish (link)
Maria at Maria's Nail Polish Blog (link)
Melanie at Nail and Polish (link)
Jessica at Beauty Gnome (link)
Emily at An Accent Nail (link)
Ameerah at Valiantly Varnished (link)

They're all great designs, and I hope I can keep up with them all and their creativity!

So, what do you think, do you think of holos as soon as the sun comes out like I do?

Until next time...

MASPOOASE x x x
~Wendy~

Saturday 1 June 2013

New Essie Haul - Swatches and Review

Hi all!

It's late at the weekend for posting I know, am having to work Saturday mornings again, and it really throws out my routine.  This achilles problem seems to be dragging on and on....

However, the sun actually came out yesterday, and I finally got around to swatching the Essies I bought a week or so ago from my trusty TK Maxx.  Good job too, because it's done nothing but rain today, if it carries on I'll need a canoe to get to work in the morning!

I was so excited when I saw these in the shop, because it actually contained polishes I'd heard of, they were Ballet Slippers, Orange It's Obvious, Tour De Finance, and Navigate Her.  For £9.99 for all four, I didn't need asking twice to pick this set up.  I'd been disappointed with the last set of Essies I got there, reviewed HERE so if I hadn't heard of these ones, I probably wouldn't have picked them up.

The first one I swatched, I nearly didn't bother with, because I knew I wouldn't like it, Ballet Slippers.  I already know it's a sheer and as you know I hate VNL, so wasn't expecting too much.  As it was, I didn't hate it as much as I thought I would.  Here's the pics.  Firstly outdoors:
Essie Ballet Slippers Swatch outside
Next indoors in shaded light:
Essie Ballet Slippers Swatch
As I always do, I made notes while I was swatching, and next to this one I wrote, first coat - not even there, which tells you how sheer it is.  The second coat was a bit patchy and streaky, so I did a third coat and this evened it out. It is super-shiny, and dry time was medium.  I don't despise it, so it can't be all bad.

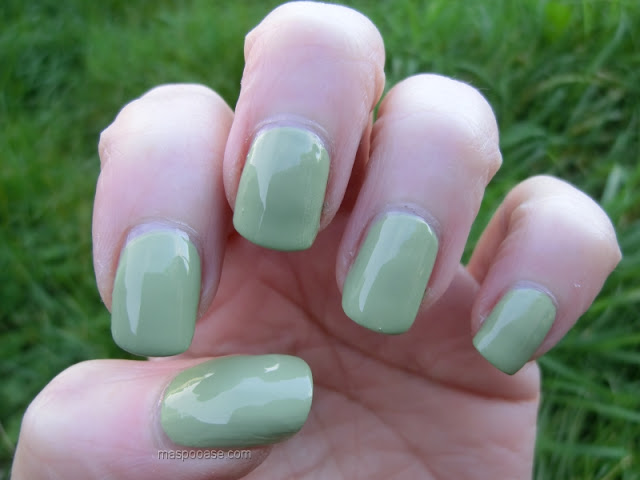
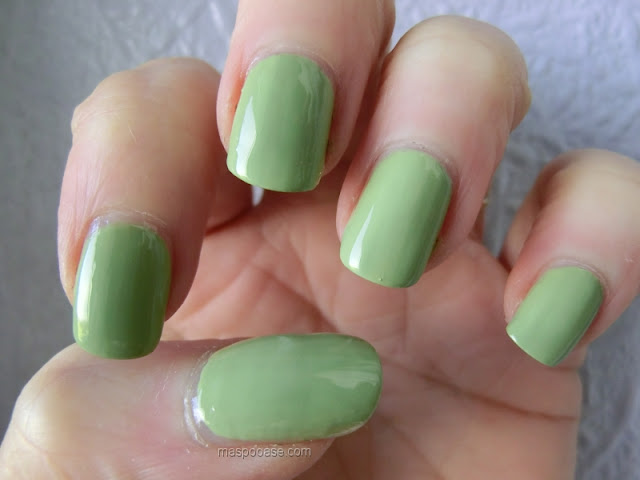
Next I swatched Navigate Her.  This was the one I was most excited to try, as alot of people seem to like it.  The formula was a bit of a nightmare, I had to take off my first attempt to apply this, as it just looked so scruffy.  It managed somehow to be runny without having any nice flowy-ness.  The first coat went on streaky.  I used 3 coats for the photos and it needed them all, as the second coat produced bald patches as it was drying.  Here's what it looked like in the garden:
Essie Navigate Her swatch outside
It's lucky for it that it's such a pretty colour, kind of a pastelly khaki, or I wouldn't consider using it again because of the formula.  As it is, I'll probably get this one out again from time to time.  Here's a pic taken inside:
Essie Navigate Her swatch
Next up we have Tour De Finance, I loved the name of this one, I don't wear many pinks but this one has a nice purply shimmer running through it, which gives it a nice depth.  I liked the formula of this one.  The first coat was patchy, but I only needed two coats for these pictures.  Firstly outside:
Essie Tour De Finance Swatch
Next indoors.  This shows the shimmer quite well:
Essie Tour De Finance Swatch
Last but not least, we have Orange, It's Obvious.  In the bottle this is a really bright primary orange.  It had a reasonably good opacity, this is 3 coats, but I could still tell where my nail tips were, so it's not going to be a go-to.  It reminded me very much of Nails Inc's Portobello, which I reviewed HERE it had the same runny formula, but it was reasonably fast drying.  Here's the outside pic:
Essie Orange Its Obvious swatch
And here's a close up.  I didn't have any inside pics, as my cuticles were starting to look a bit ick, and this was one of the least disgusting pics I could find out of the ones I took:
Essie Orange Its Obvious swatch
And last but not least, here's the brush shot.  It was a wide but flat brush, it was actually very wide, and if you have narrow fingers you might struggle, but I didn't find it too bad.  The green brush is sideways on:
Nail Polish Bottles
So there we have it, one set swatched, do you own any of these?  What do you think?

Until next time......

MASPOOASE x x x
~Wendy~